
You may be tempted to hire an emergency plumber if your kitchen or bathroom sink becomes clogged. clogged sinks are an inconvenience and sometimes nasty nightmare. The finest sink unblocker, however, is really a mix of knowledge, perseverance, and plain ol’ elbow grease if you want to save some cash!
Therefore, if you’re willing to put in the time and effort, we have the knowledge for you below, including how to unclog a sink without a plunger. However, if you do have one on hand…
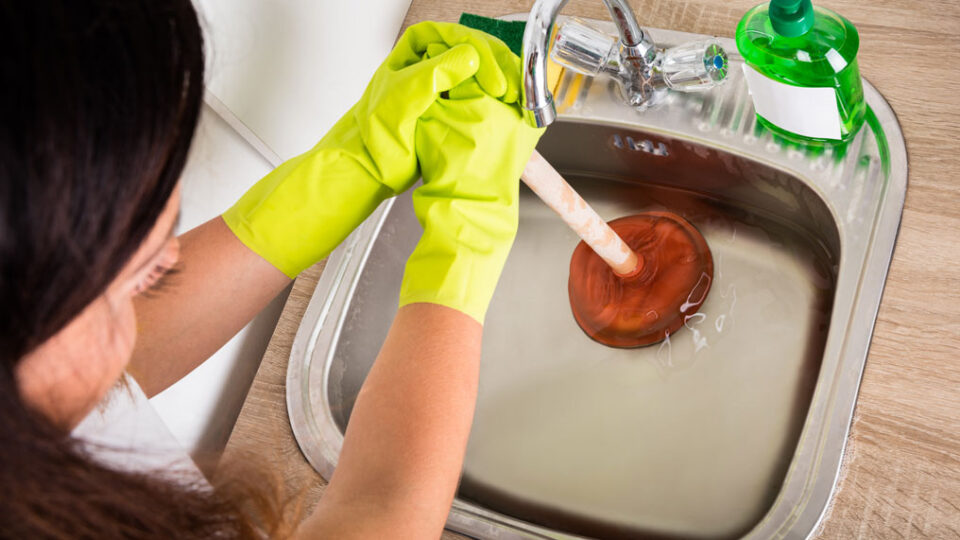
- using a plunger to clear a clogged sink
- the simplest method for removing a clog is to use a plunger to unblock a sink. The equipment you’ll need to complete the task is listed below:
- a plunger in cup-like form
- a solution for removing limescale
- the sponge
- duct tape (or an outdated dishtowel)
- a large towel
- a mug or container
Step 1: Remove all water from the sink
Remove and discard the extra water using the cup if the sink is half full with water that won’t drain. The objective is to start with a sink basin that is mostly devoid of water.
Ste 2:Seal the sink overflow
To eliminate any moisture, use the towel or some tissues to wipe the region around the overflow (the hole just below the faucets). Apply duct tape to the overflow now or fill it with a dishcloth to make an airtight closure.
Step 3: Use a towel to cover the floor
To prevent any water from dripping over the edge of the sink basin, spread the towel out on the floor around it.
Step 4:Clean the plughole
Remove the plughole by unscrewing it and giving it a thorough cleaning with the sponge and limescale remover. Look through the plughole to determine if there are any evident obstructions that you can manually clear.
Replace the plughole and wipe away any moisture once the area has been cleaned. If you succeeded in clearing a clog, test the sink’s drainage by turning on the faucets.
Learn how to get rid of dampness, mildew, and limescale at home by reading this article.
Step 5:Take the leap
Put the plunger’s bottom over the plughole and firmly push down. Run the faucets for a short while until there are a few inches of lukewarm water around the plunger seal.
Now, while holding the plunger handle firmly in both hands, aggressively pump it up and down to produce suction. With any hope, you’ll be able to remove the obstruction and hear the appreciative sink gurgle with gratitude. Continue to the recommendations below if this doesn’t work and the obstruction still exists.
How to clear a clogged drain without a plunger
The following do-it-yourself suggestions utilising standard household objects are worth trying if the plunger hasn’t worked or if you can’t find one.
Make sure your sink is dry for all of the following suggestions so you have clear access to the plughole. To assist remove the obstruction, you’ll also need to boil some water in a kettle.
- White vinegar and bicarbonate of soda (or baking powder)
This idea is wonderful since you probably already have both of these things in your kitchen cabinets. Even if you don’t, you can get both of them in your neighbourhood store for almost nothing.
All you have to do is pour a few tablespoons of bicarbonate of soda and a cup of white vinegar down the plughole. After approximately five minutes, try flushing the obstruction with hot water from the kettle.
- Washing powder with bacteria
This is an excellent approach to remove grease clogs like chip fat or other greasy materials that shouldn’t be flushed down the drain. It is quite similar to the procedure described above.
Just pour two teaspoons of washing soda down the drain and then fill the rest of the kettle with hot water to flush it out. Instead of washing powder, soda crystals may also be used for this method.
- White vinegar and Alka Seltzer
Though less successful than the approaches mentioned above, this is still worth a go. Simply pour a few pills (or tablespoons if you have the powder form) down the drain. Immediately follow it with a cup of white vinegar to drown it out. After giving it some time to perform its magic, pour the whole kettle of boiling water down.
- Remove the obstruction with a wire or other instrument.
You’ll need some flexible drain-unblocking wire for this, which you can either get locally from a hardware shop or make yourself using nett curtain wire or a metal coat hanger. Till you find resistance from the obstruction, feed the wire through the plug hole. Press gently but gradually until the obstruction is properly removed.
Important advice: When using these things, never spin the pipe anticlockwise since doing so might cause the pipe to come undone and cause a flood. Read more for blocked drains in Lane Cove.
- Use a water blast
If you have an empty 2-liter soft drink bottle laying around, you might try utilising water pressure to remove the obstruction. Simply pour warm water into the bottle, then insert the open end into the plughole. Squeeze the bottle firmly and fast to push the water out of the bottle and down the drain. Hopefully, the high-pressure water blast will be sufficient to remove the obstruction.
Step 6:Use an organic drain cleaning
In terms of organic stuff, such as fat accumulations, grease, and even hair, a natural drain cleaner is quite effective. Enzymatic in nature, natural drain cleaning is often more environmentally friendly than harsher chemicals like caustic soda or bleach.
Step 7:Hot water and bleach
Since bleach is highly caustic, we advise only using this as a last option. You probably don’t need the safety talk, but just in case, please make sure you always use safety gloves and keep bleach away from your eyes and nose. Once the safety measures are in order, pour around a cup of bleach down the sink before gently adding hot water from the kettle to flush it out.
If none of them do, then…
How to open a blocked u-bend
If none of the aforementioned suggestions have been successful, it’s time to put on your combat boots and go straight for the obstruction. It is quite natural if at this stage you are hesitant to mess with your pipes and wish to hire a plumber.
However, we can guarantee you that you can do this task on your own rather easily. All you need to do is be ready to get a bit drenched. A strong stomach is also helpful since the obstruction will not smell pleasant.
To complete the task, you will need the following supplies:
- A flexible wrench
- Leather gloves
- Bacteriophage remover
- Sponge
- A trough
- Towels
- Get ready a bit before you begin
Get dressed in some clothing that you don’t mind getting wet before anything else. You should not do this task while wearing your Sunday best and should put on your rubber gloves since it will be really dirty.
After that, spread out some towels below the sink to absorb any extra water. If you’re going to stay under the sink for a long, don’t forget to reserve one of the towels for yourself to use as a headrest. Lastly, tuck the bucket under the u-bend.
Toilet problems? How to open a clogged toilet
- Get rid of the u-bend
Utilising your wrench, slowly remove the threaded caps from the u-bend’s two sides. Direct any water that may flow out into the bucket. You may apply a spray of WD40 or any comparable lubricant to loosen the threaded caps if they are stiff (due to age).
The u-bend should ideally be moved to another sink or an outdoor location so that water may be used to flush it clean. Since germs have probably been hiding in the u-bend for some time, use the antibacterial spray and sponge to thoroughly clean it now.
- Attach the u-bend again.
Reattach the u-bend using the wrench, then carefully run the cold tap to make sure the seal is intact. Hopefully there won’t be any leaks, at which point you may take the bucket and cloths away. Try removing and reattaching the u-bend again if you do detect a leak.
- Verify that the obstruction has been removed.
To check whether the sink is draining properly, run the cold water faucet one more.
How to proceed if your sink remains clogged
If the sink is still clogged at this stage, you may have little choice but to call in the pros. But don’t let it discourage you. In most circumstances, if the aforementioned measures haven’t been successful, there may be a more serious problem that has to be addressed right once.
typical reasons for clogged sinks
It’s critical to keep in mind that your sink is designed to drain liquids, not solids. Therefore, you should resist the urge to pour the following items into your plughole in order to prevent future blockages:
- tissues, such as toilet paper
- food (include those little carrot flecks or pet food)
- both cotton buds and cotton wool
- cigarettes and ash from cigarettes
- straws included), plastic, and cardboard
- Large amounts of fat (like chip fat)
In essence, anything that isn’t a liquid shouldn’t go down your plughole. Prevention is always better than treatment if you want to keep your drains clear and maintain a healthy drainage system.